Jalapeño Popper Dip: Creamy, Cheesy, Oven-Baked
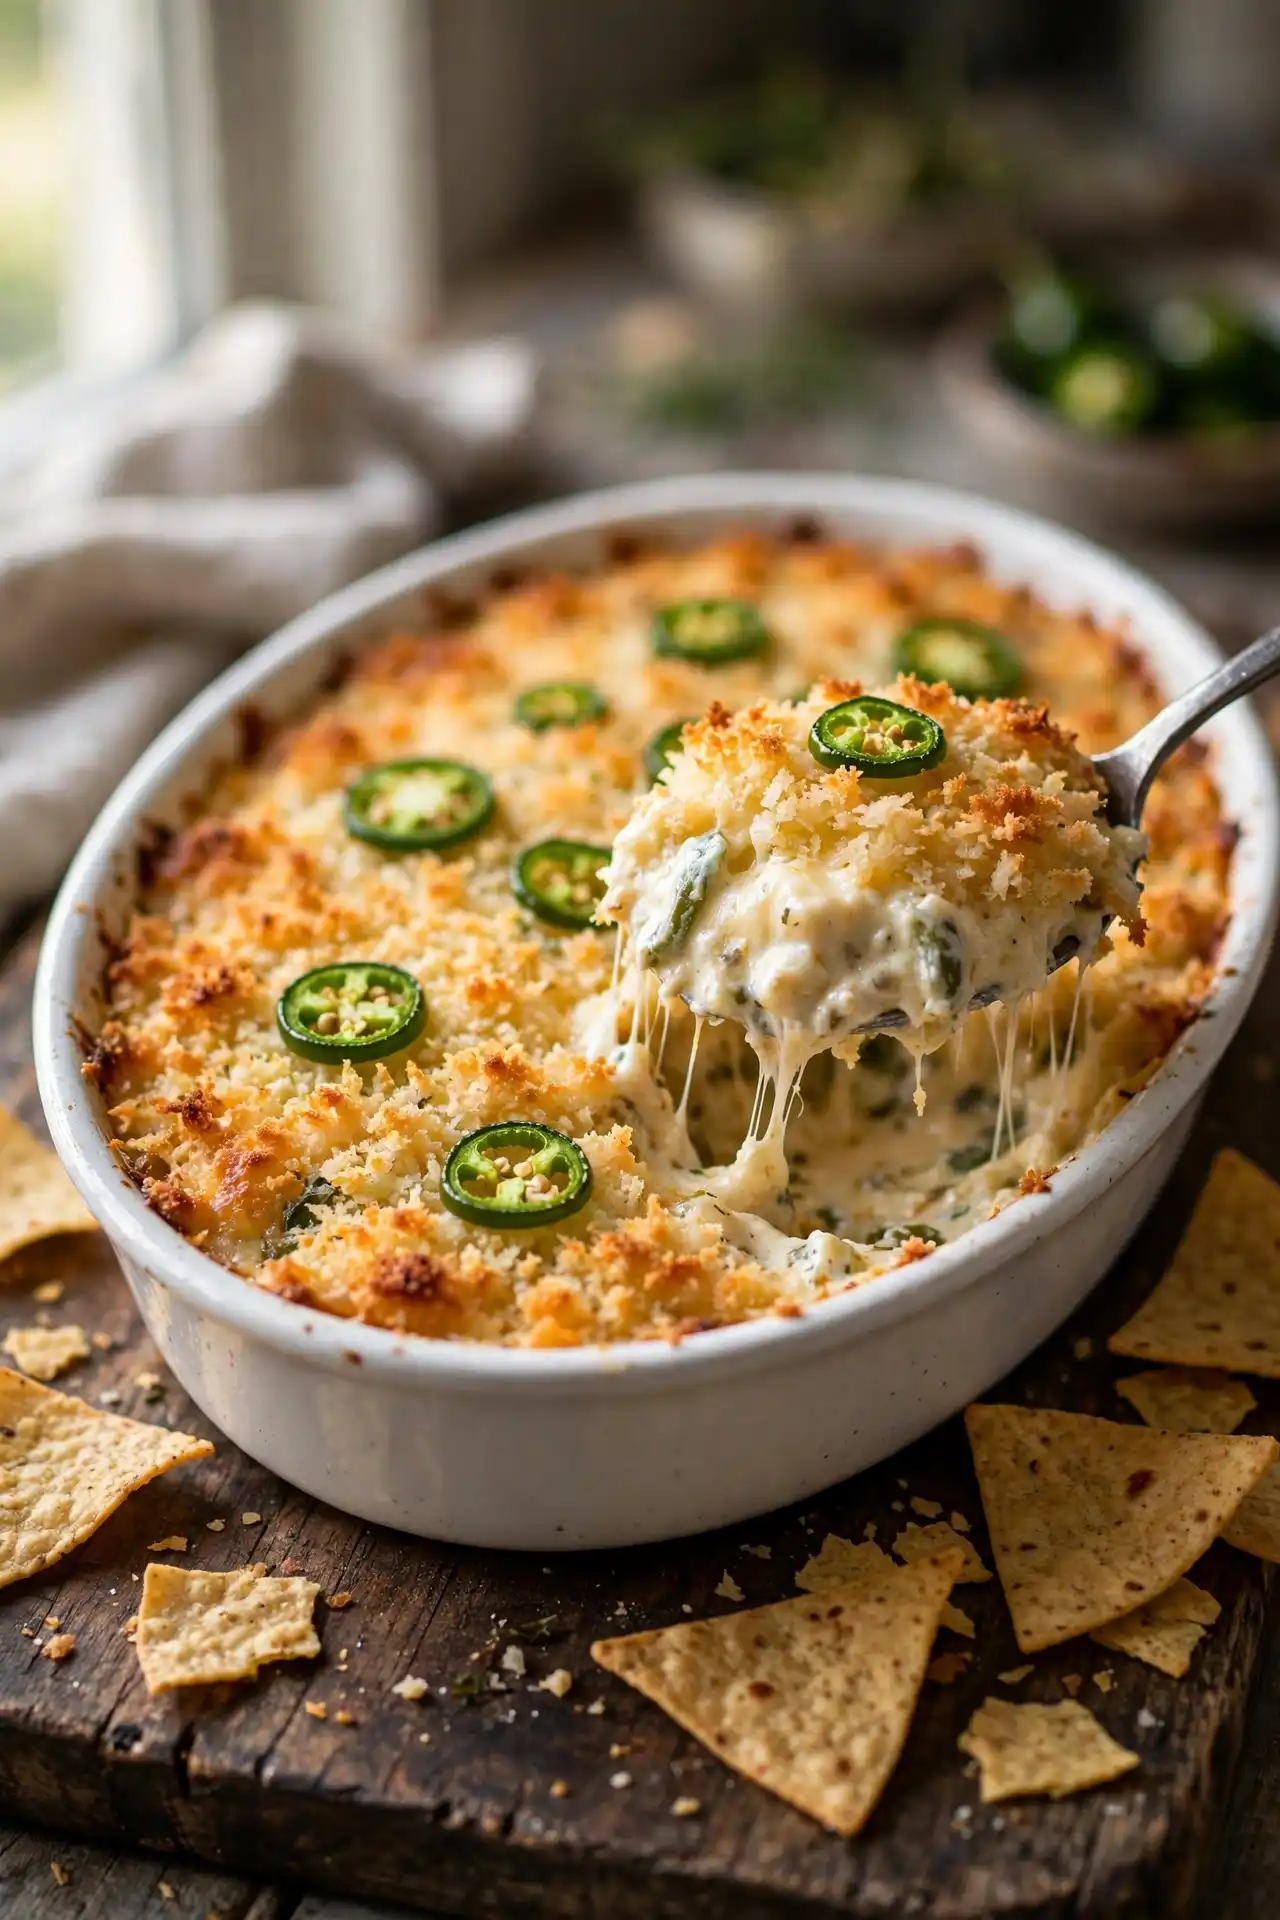
Jalapeño popper dip takes everything that makes the appetizer worth eating — the cream cheese, the melted cheddar, the heat — and puts it in a baking dish you can set in the middle of a table and let people dig into with chips. No stuffing individual peppers, no fiddly assembly, and no trying to keep small pieces warm for an hour while people are still arriving.
This version builds the heat in two layers. Fresh jalapeños deliver a brighter, grassier bite, while a can of mild green chiles adds a deeper, slightly sweeter warmth underneath. The panko topping gets mixed with Parmesan and melted butter before going on, so it comes out of the oven properly crispy rather than pale and soft.
Why You’ll Love This Jalapeño Popper Dip
- The Parmesan-panko crust stays genuinely crispy for at least 10 minutes after it comes out of the oven
- Fresh jalapeños and canned green chiles create two distinct levels of heat in a single dish
- The whole thing assembles in one bowl with no pre-cooking required
- Assemble it the day before, refrigerate, and bake fresh when guests arrive
- Doubles easily to feed 20 or more without changing technique
Why You’ll Love This Jalapeño Popper Dip
- The Parmesan-panko crust stays genuinely crispy for at least 10 minutes after it comes out of the oven
- Fresh jalapeños and canned green chiles create two distinct levels of heat in a single dish
- The whole thing assembles in one bowl with no pre-cooking required
- Assemble it the day before, refrigerate, and bake fresh when guests arrive
- Doubles easily to feed 20 or more without changing technique
Ingredients You’ll Need
For the Dip
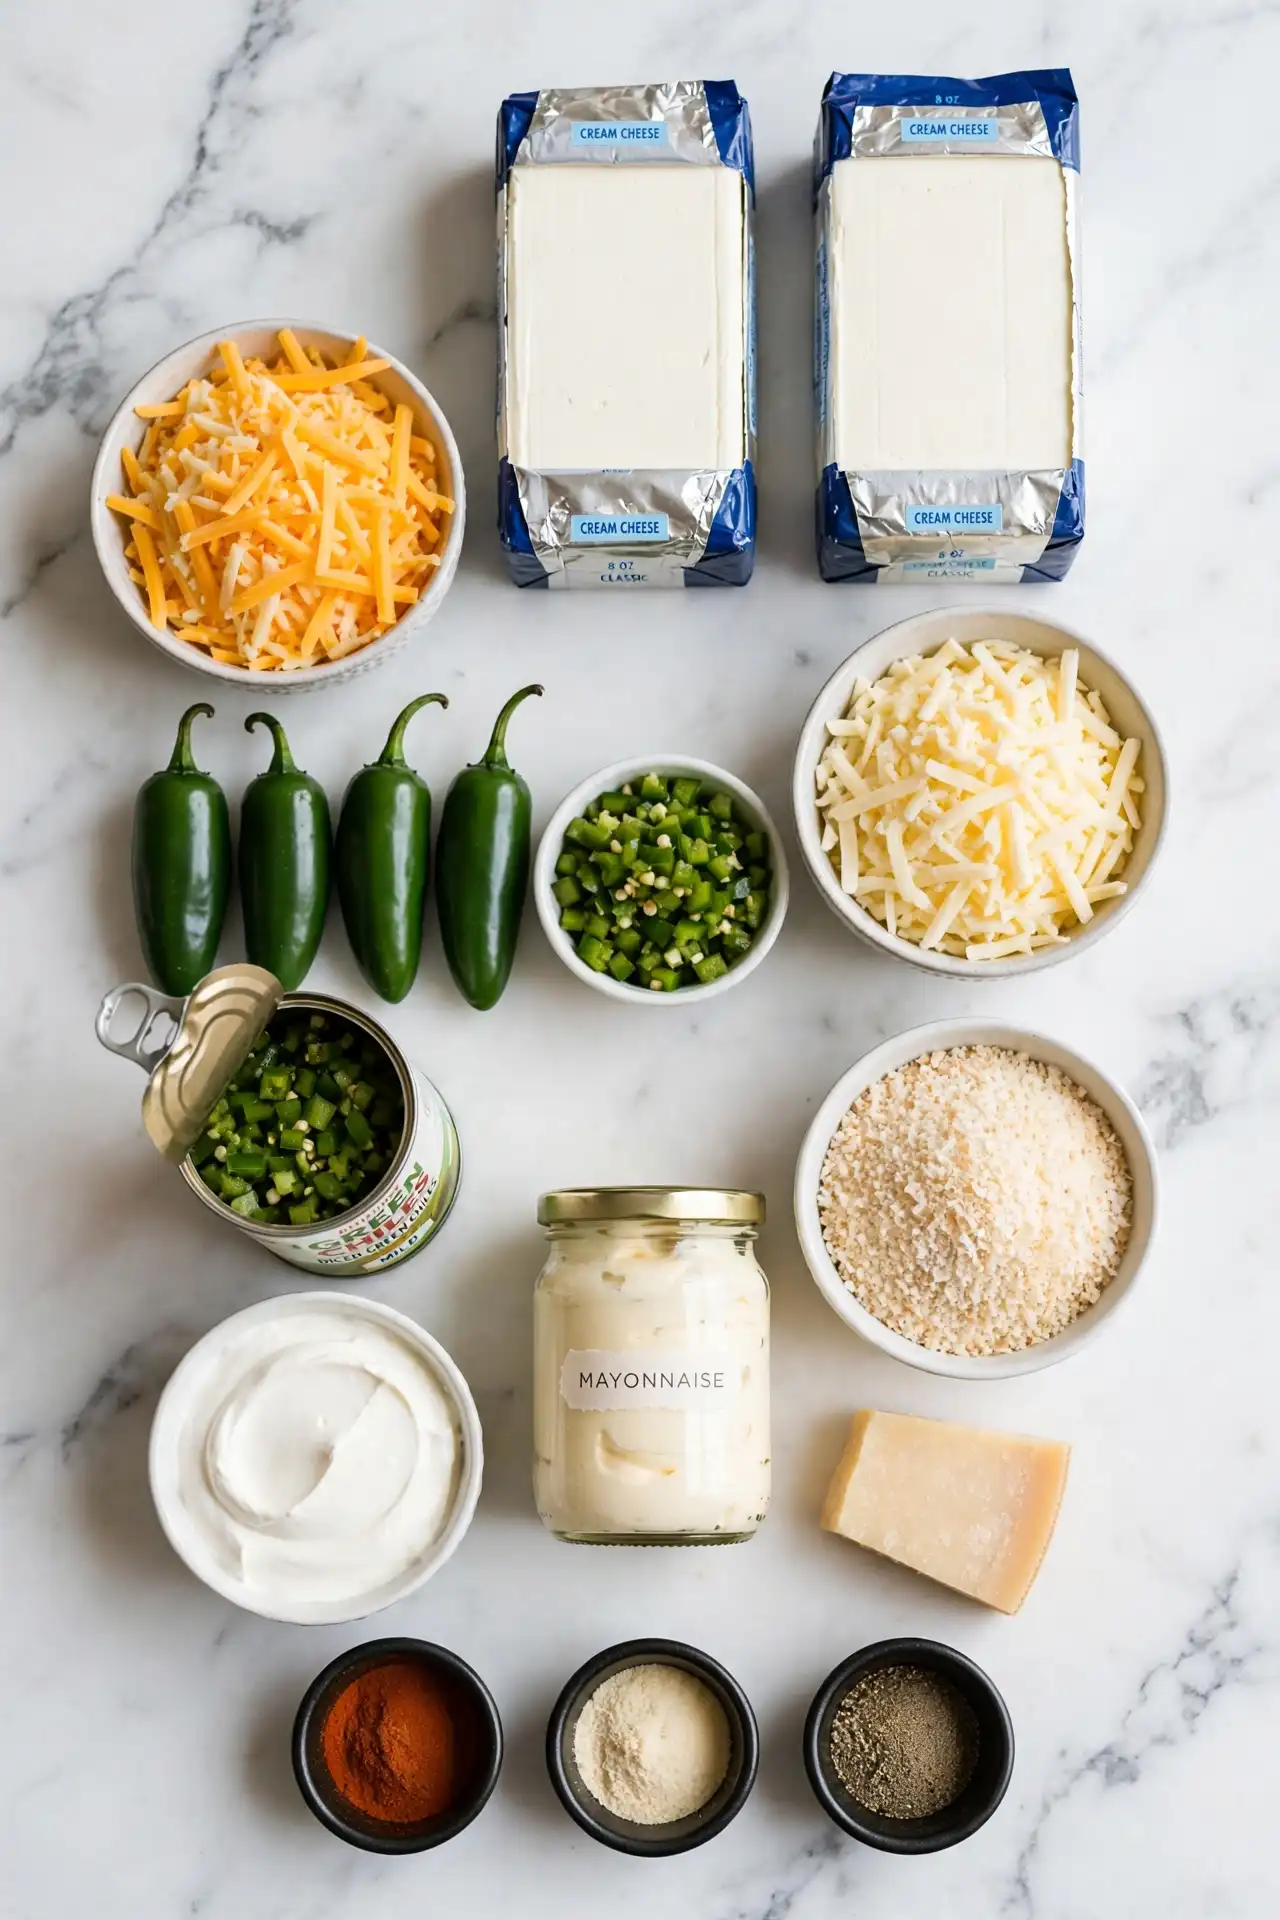
- 2 (8 oz / 226g) blocks full-fat cream cheese, softened to room temperature — cold cream cheese leaves visible lumps in the finished dip that don’t smooth out during baking
- ½ cup (120g) sour cream — adds tang and loosens the base just enough for clean scooping without making the dip runny
- ½ cup (110g) mayonnaise — keeps the dip smooth and emulsified through the heat of the oven
- 2 cups (200g) shredded sharp cheddar cheese — sharp variety has significantly more flavor than mild; block cheese shredded at home melts more smoothly than pre-shredded, which is coated in anti-caking agents
- 1 cup (100g) shredded Monterey Jack cheese — melts cleanly and keeps the overall texture cohesive
- 4 fresh jalapeños, seeds and membranes removed, finely diced (about ½ cup) — removing the seeds cuts heat by roughly half without losing the pepper’s flavor
- 1 (4 oz / 113g) can diced green chiles, drained and pressed dry — adds a mild, slightly sweet layer of heat that rounds out the brightness of the fresh jalapeños
- 3 garlic cloves, minced — raw garlic goes in here and becomes mellow and slightly sweet during the 25-minute bake
- 1 tsp onion powder
- ½ tsp smoked paprika
- ½ tsp fine salt
- ¼ tsp black pepper
For the Panko Topping
- ¾ cup (45g) panko breadcrumbs — coarser texture than regular breadcrumbs; creates a noticeably crunchier crust
- 2 tbsp (28g) unsalted butter, melted
- ¼ cup (25g) finely grated Parmesan cheese
- ½ tsp garlic powder
- Pinch of fine salt
Recipe Timing
| Timing Element | Duration |
|---|---|
| Prep Time | 15 minutes |
| Cook Time | 25 minutes |
| Total Time | 40 minutes |
Servings: 10 | Difficulty: Easy | Cuisine: American | Course: Appetizer
How to Make Jalapeño Popper Dip: Step by Step
Step 1: Preheat the oven and prepare the dish
Set your oven to 375°F (190°C). Lightly grease a 9-inch square baking dish (or a 9×13-inch dish for a thinner layer that stretches to more servings) with cooking spray or a thin smear of softened butter. A ceramic or glass baking dish works best here; metal pans conduct heat faster at the edges, which can lead to uneven cooking.
Step 2: Beat the cream cheese until smooth
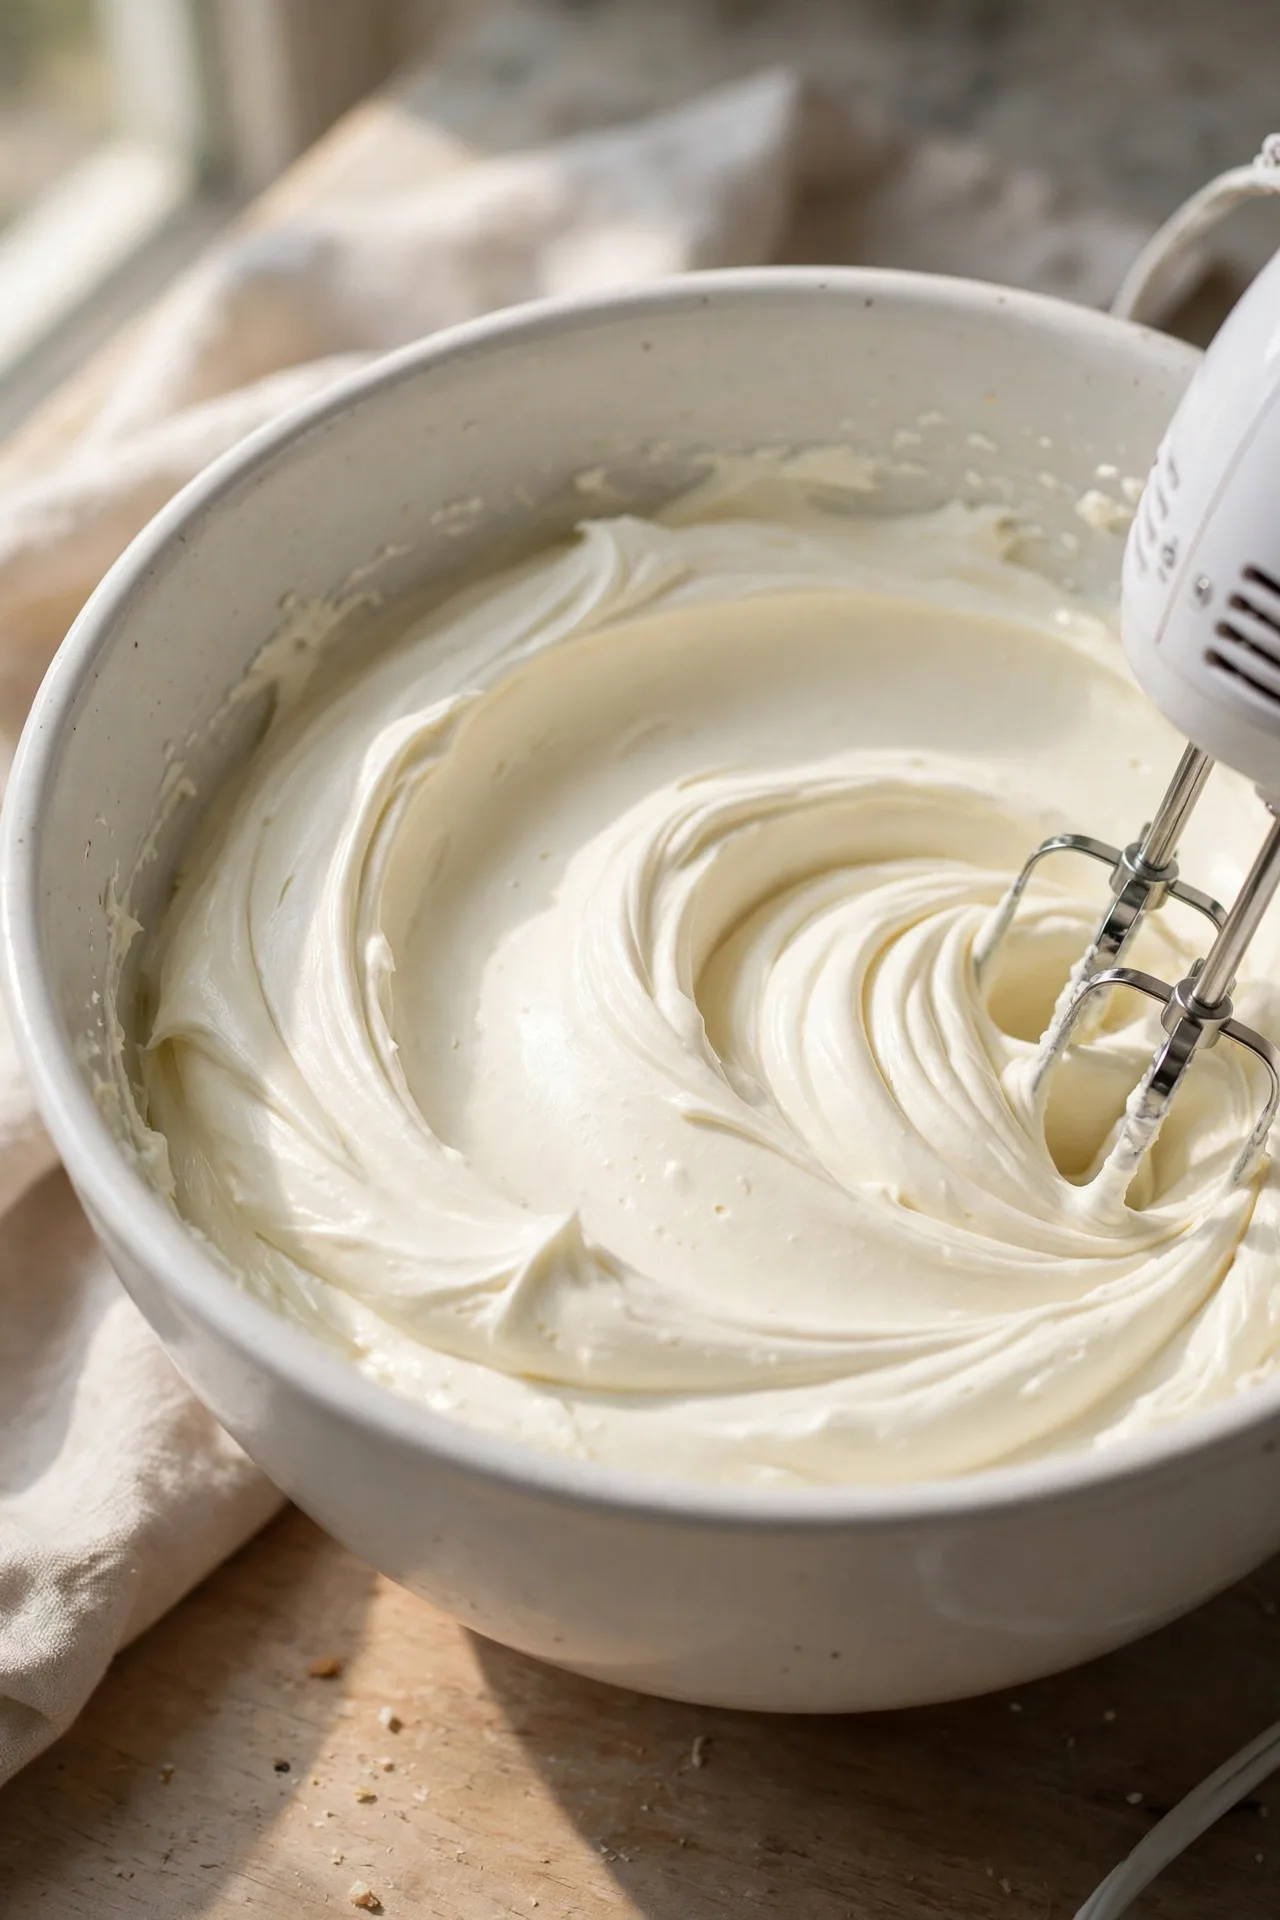
Place both softened blocks of cream cheese in a large mixing bowl. Beat with a hand mixer on medium speed for about 1 minute, or with a sturdy spatula for 2 to 3 minutes, until the cream cheese is completely smooth with no visible lumps. It should look like thick, spreadable frosting at this stage.
Why this works: Beating the cream cheese alone first, before adding any liquids, gives you a genuinely smooth base. Adding the sour cream and mayo too early makes the mixture harder to smooth out, and the lumps tend to survive the bake.
⚠️ Food Safety: Wash hands thoroughly after handling fresh jalapeños. Capsaicin transfers from cut peppers to skin and causes significant irritation if it reaches your eyes or mouth. Consider wearing disposable gloves while dicing. For more guidance, refer to the FDA’s safe food handling recommendations.
Step 3: Add the sour cream and mayonnaise
Add the sour cream and mayonnaise to the beaten cream cheese. Mix until all three are fully combined into one smooth, uniform base. Scrape down the sides of the bowl and mix once more to make sure nothing is left unmixed at the bottom. The mixture should be thick and slightly glossy.
Step 4: Fold in the cheeses, jalapeños, and seasonings
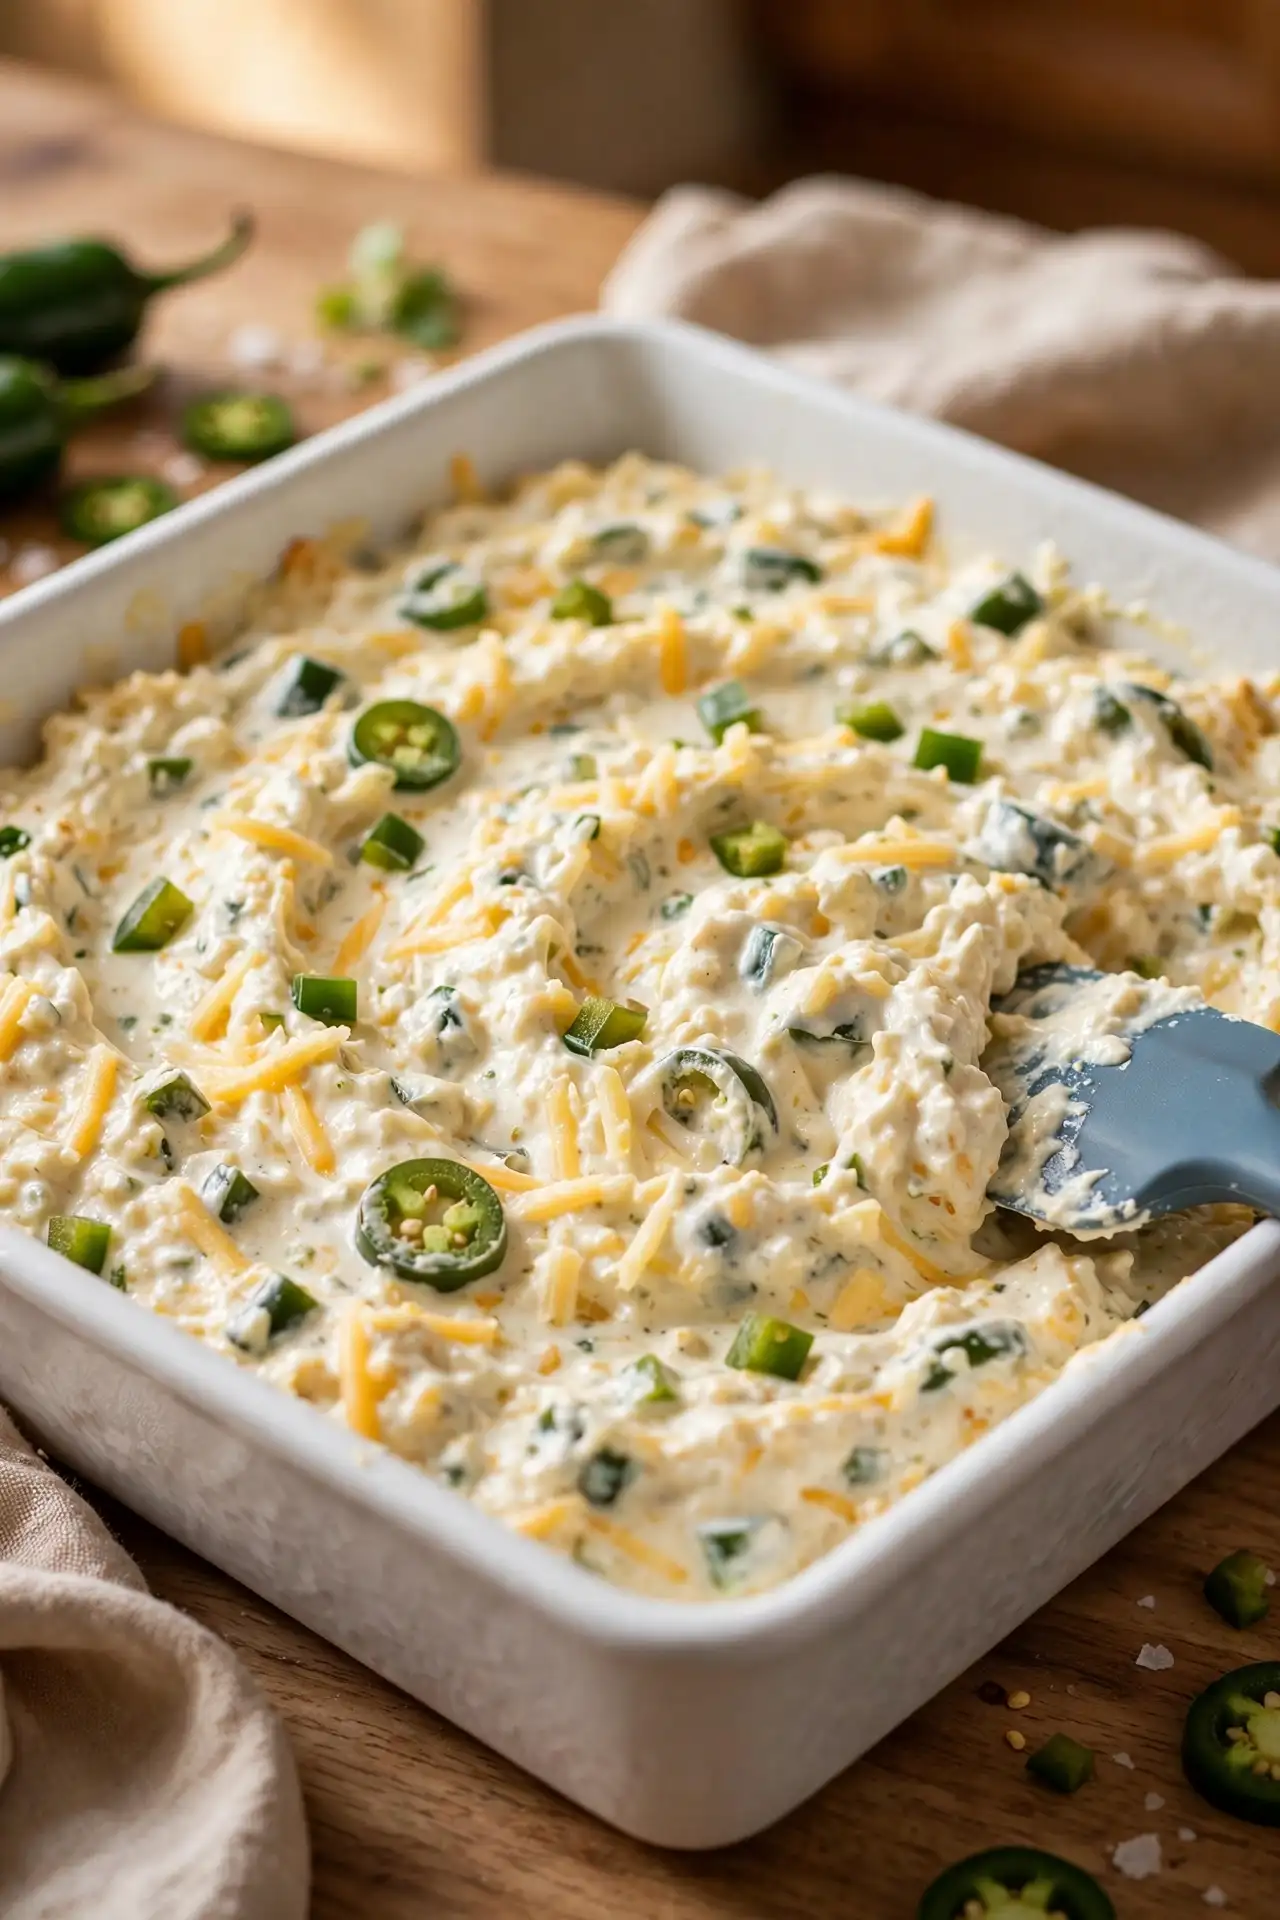
Add the shredded cheddar, shredded Monterey Jack, diced jalapeños, drained green chiles, minced garlic, onion powder, smoked paprika, salt, and pepper. Fold everything together with a spatula until the ingredients are evenly distributed through the base. The mixture will be very thick and hold its shape when you lift the spatula.
Why this works: Folding (rather than mixing on high speed) keeps the shredded cheese intact in the base. The cheese then melts into distinct pockets during baking rather than fully dissolving, which gives the finished dip more texture.
⚠️ Food Safety: Make sure raw jalapeños and any other fresh produce are washed before chopping. Cross-contamination from unwashed produce is a common overlooked risk when making dips that won’t be cooked for long at high temperatures.
Step 5: Transfer to the baking dish
Spoon the mixture into the greased baking dish. Use the back of the spatula to spread it into an even layer, pushing it all the way into the corners. Consistent thickness is important — thin spots at the edges will dry out before the center finishes heating through.
Step 6: Make the panko topping
In a small bowl, combine the panko breadcrumbs, melted butter, grated Parmesan, garlic powder, and salt. Stir until every crumb is evenly coated in butter. The mixture should look like damp sand. If it looks dry or powdery, add half a teaspoon more of melted butter and stir again.
Why this works: Coating the panko in butter before baking is what creates a consistently golden, crispy crust. Dry panko added directly to the top either burns at the edges before the center is hot or stays pale and soft throughout.
Step 7: Add the topping and bake
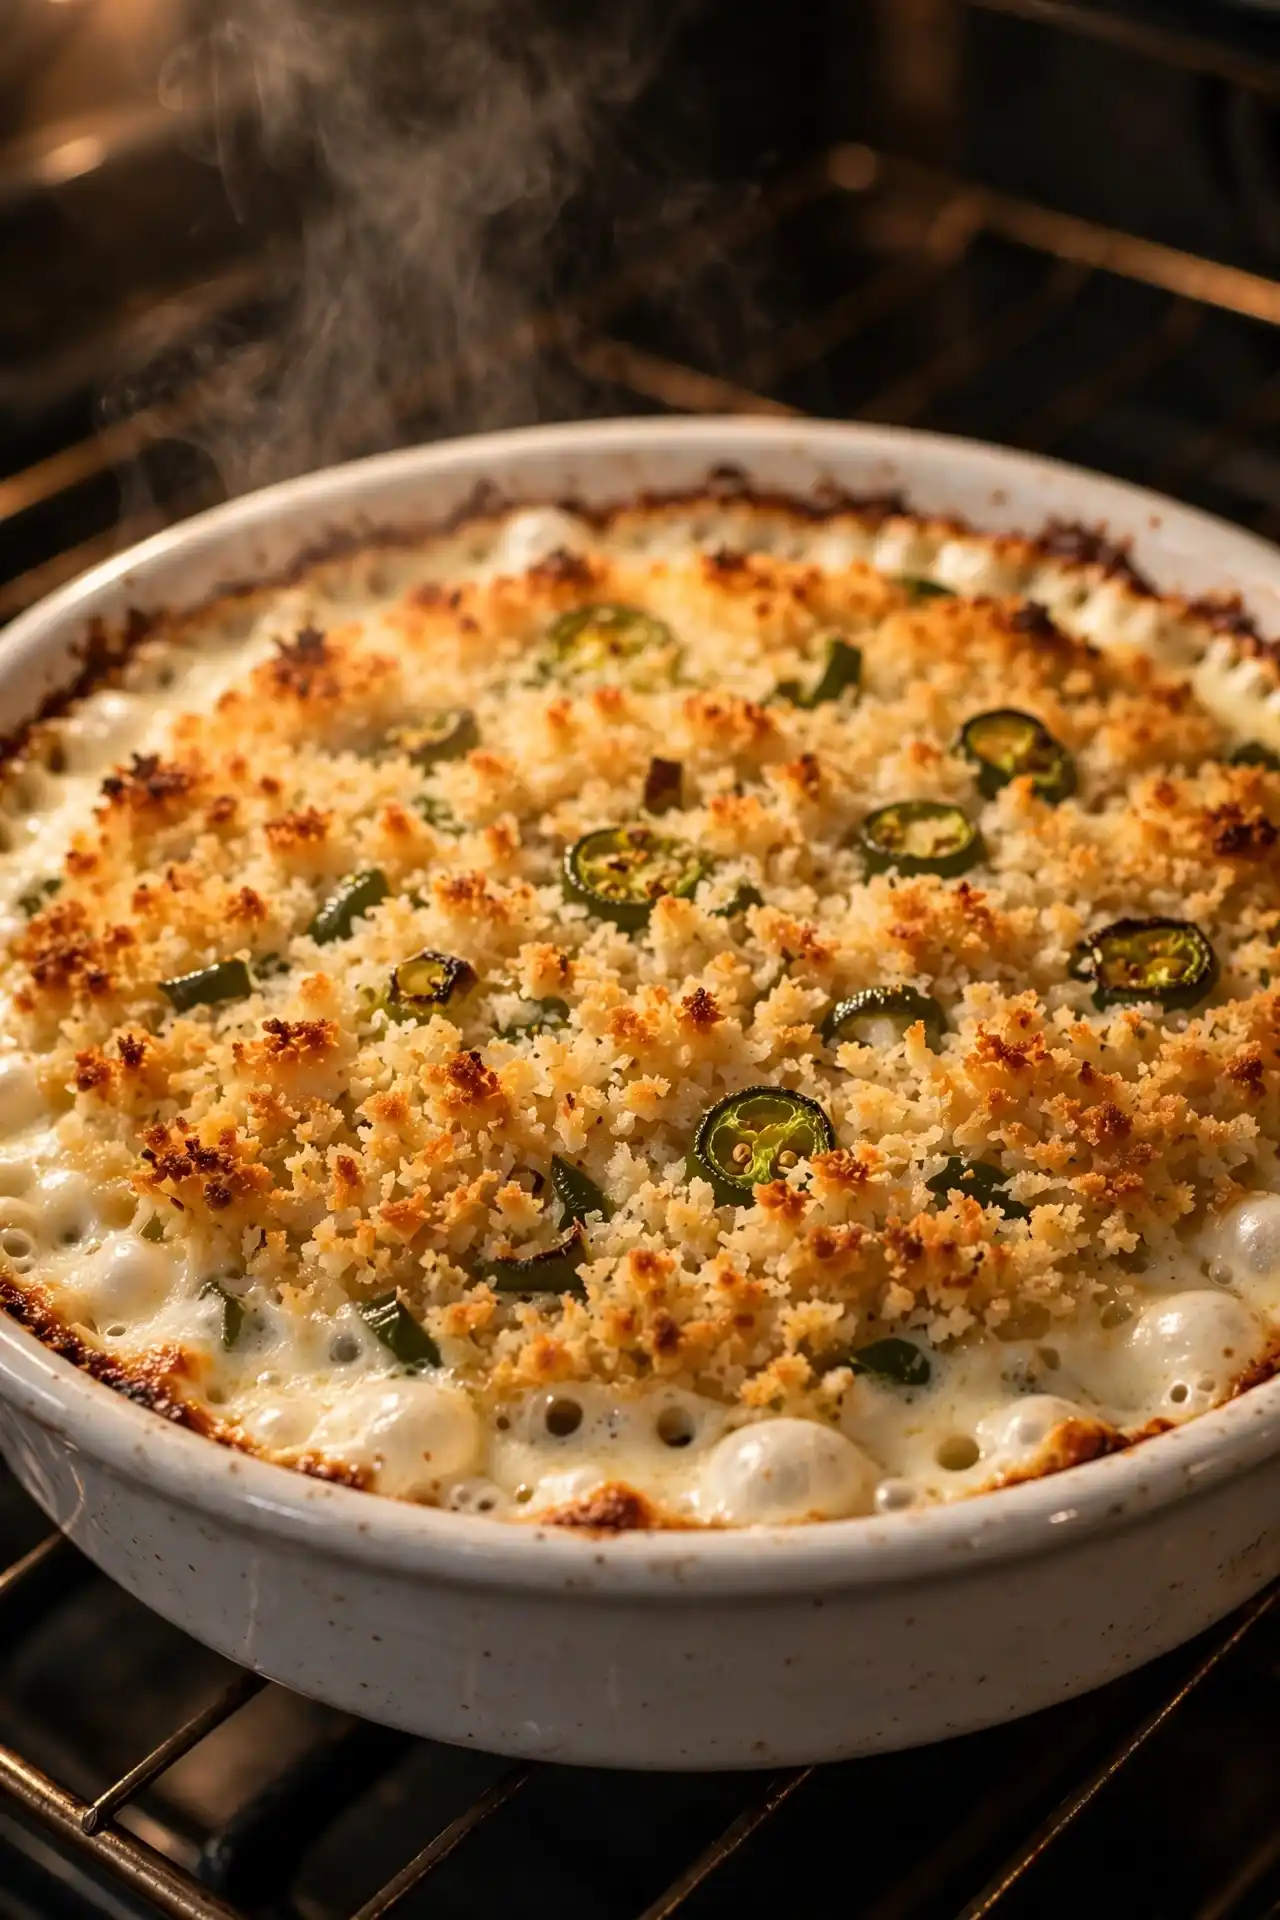
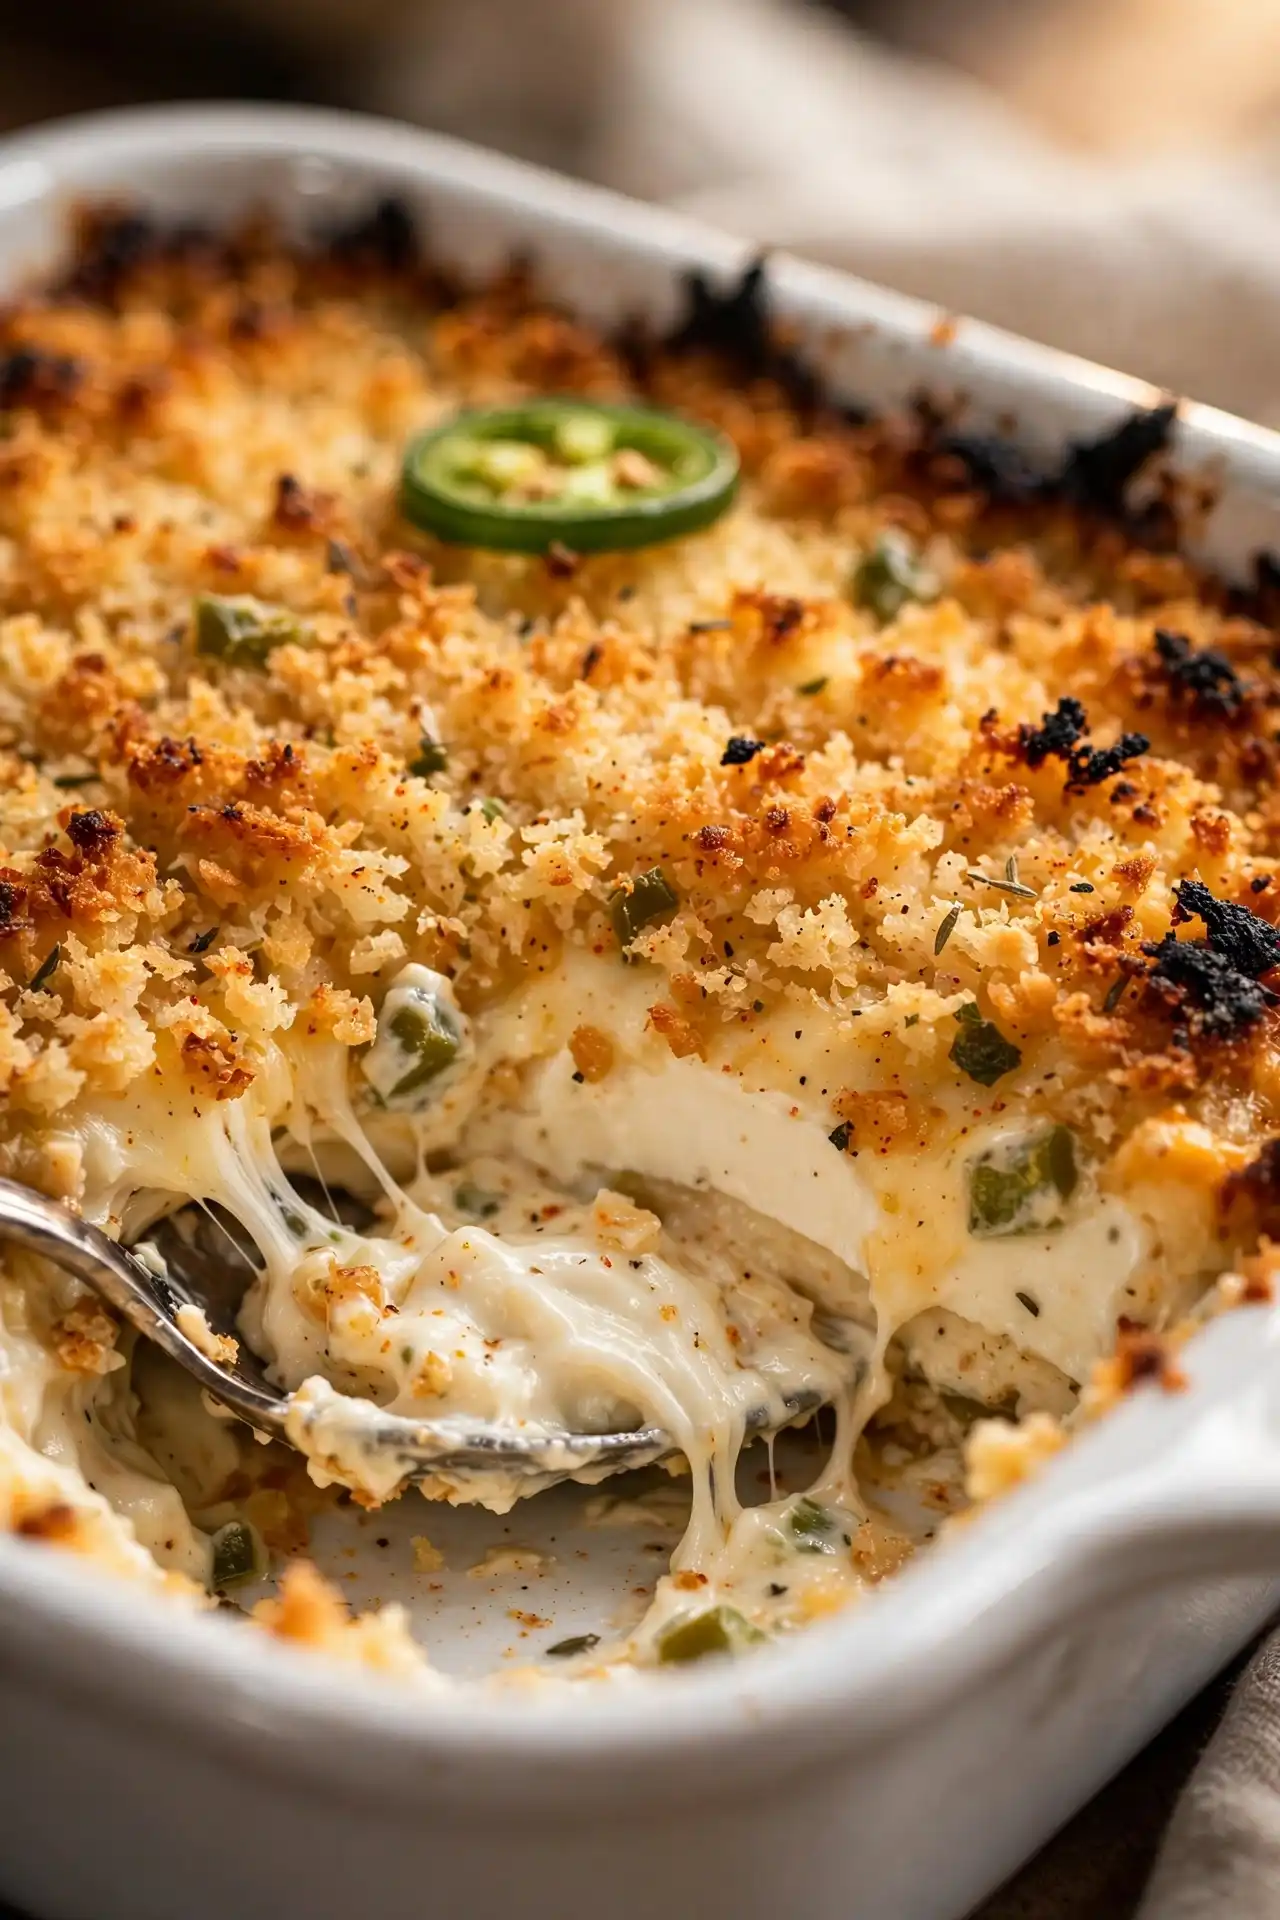
Scatter the buttered panko mixture evenly over the surface of the dip. Bake on the center oven rack for 22 to 25 minutes, until the edges are visibly and actively bubbling and the panko topping is deep golden brown across the full surface. Press an instant-read thermometer into the center of the dip — it should read at least 74°C (165°F).
Step 8: Rest before serving
Remove the dish from the oven and let it sit for 5 minutes before serving. The dip firms up slightly as it cools, which makes it easier to scoop cleanly onto chips without the dip sliding off.
Key Tips for Best Results
Get the cream cheese genuinely soft before you start. This means leaving it out for 45 to 60 minutes at room temperature, not just 10 or 15. Press your finger into the center of a block. If it feels cold or firm at the core, it needs more time. Cold cream cheese is the reason most batches turn out lumpy — those white specks don’t break down in the oven no matter how long you bake it.
Drain the canned chiles, then press them dry. Pour them into a fine-mesh strainer, then press firmly against the mesh with the back of a spoon until very little liquid comes out. Canned chiles hold a surprising amount of liquid even after they look drained, and that extra moisture is the most common reason this dip turns watery after baking.
Control the heat level by adjusting what you keep from the jalapeños. All seeds and membranes left in across four peppers gives a medium-spicy dip. All seeds and membranes removed gives mild-medium. Two seeded jalapeños only (with all membranes removed) plus the can of chiles gives a genuinely approachable heat level for most guests. The green chiles add warmth on their own, so you can go light on the fresh jalapeños without losing the pepper character.
Common Mistakes to Avoid
Using reduced-fat cream cheese
Why it happens: It seems like a reasonable lighter swap.
How to avoid it: Reduced-fat cream cheese has a significantly higher water content than full-fat. The extra moisture makes the dip thin and slightly grainy when heated. Use full-fat cream cheese every time — the texture depends on it.
Skipping the draining step for the canned chiles
Why it happens: It looks like a minor detail.
How to avoid it: Those chiles carry enough retained liquid to noticeably thin the dip after 25 minutes in a hot oven. Drain them, then press them dry.
Overbaking
Why it happens: Waiting for more color on the panko.
How to avoid it: Once the panko is golden and the edges are actively bubbling, pull the dish. Baking past 27 to 28 minutes dries out the cream cheese layer and makes the dip stiff and hard to scoop. The center of the panko crust will look slightly lighter than the edges when the dip is actually done — this is correct and not a reason to leave it in longer.
Using pre-shredded cheese from a bag
Why it happens: Easiest option available.
How to avoid it: Pre-shredded cheese is coated in anti-caking starch (cellulose powder or similar) that prevents complete melting. Shredding cheddar and Monterey Jack from blocks adds 3 minutes to prep and produces a noticeably smoother, creamier finished dip.
Variations and Substitutions
Canned jalapeños instead of fresh: Use ¼ cup of well-drained, chopped canned jalapeños as a direct substitute for the fresh peppers. The flavor will be slightly more acidic from the pickling brine, and the heat comes in softer. A combination of both works well too — two fresh jalapeños plus 2 tablespoons of canned — which gives a more complex pepper flavor than either alone.
Extra smoky without meat: Add ½ teaspoon of chipotle powder alongside the smoked paprika, or stir in 1 to 2 tablespoons of adobo sauce from a can of chipotles in adobo. This gives the dip a deeper, campfire-smoke quality that some people find more satisfying than the plain paprika version.
With a smoky protein topping: Cook 4 to 5 strips of halal beef bacon or turkey bacon until crispy, crumble, and scatter over the dip on top of the panko layer before baking. The salty, smoky protein is what most halal home cooks are looking for when they see traditional versions of this recipe calling for pork bacon.
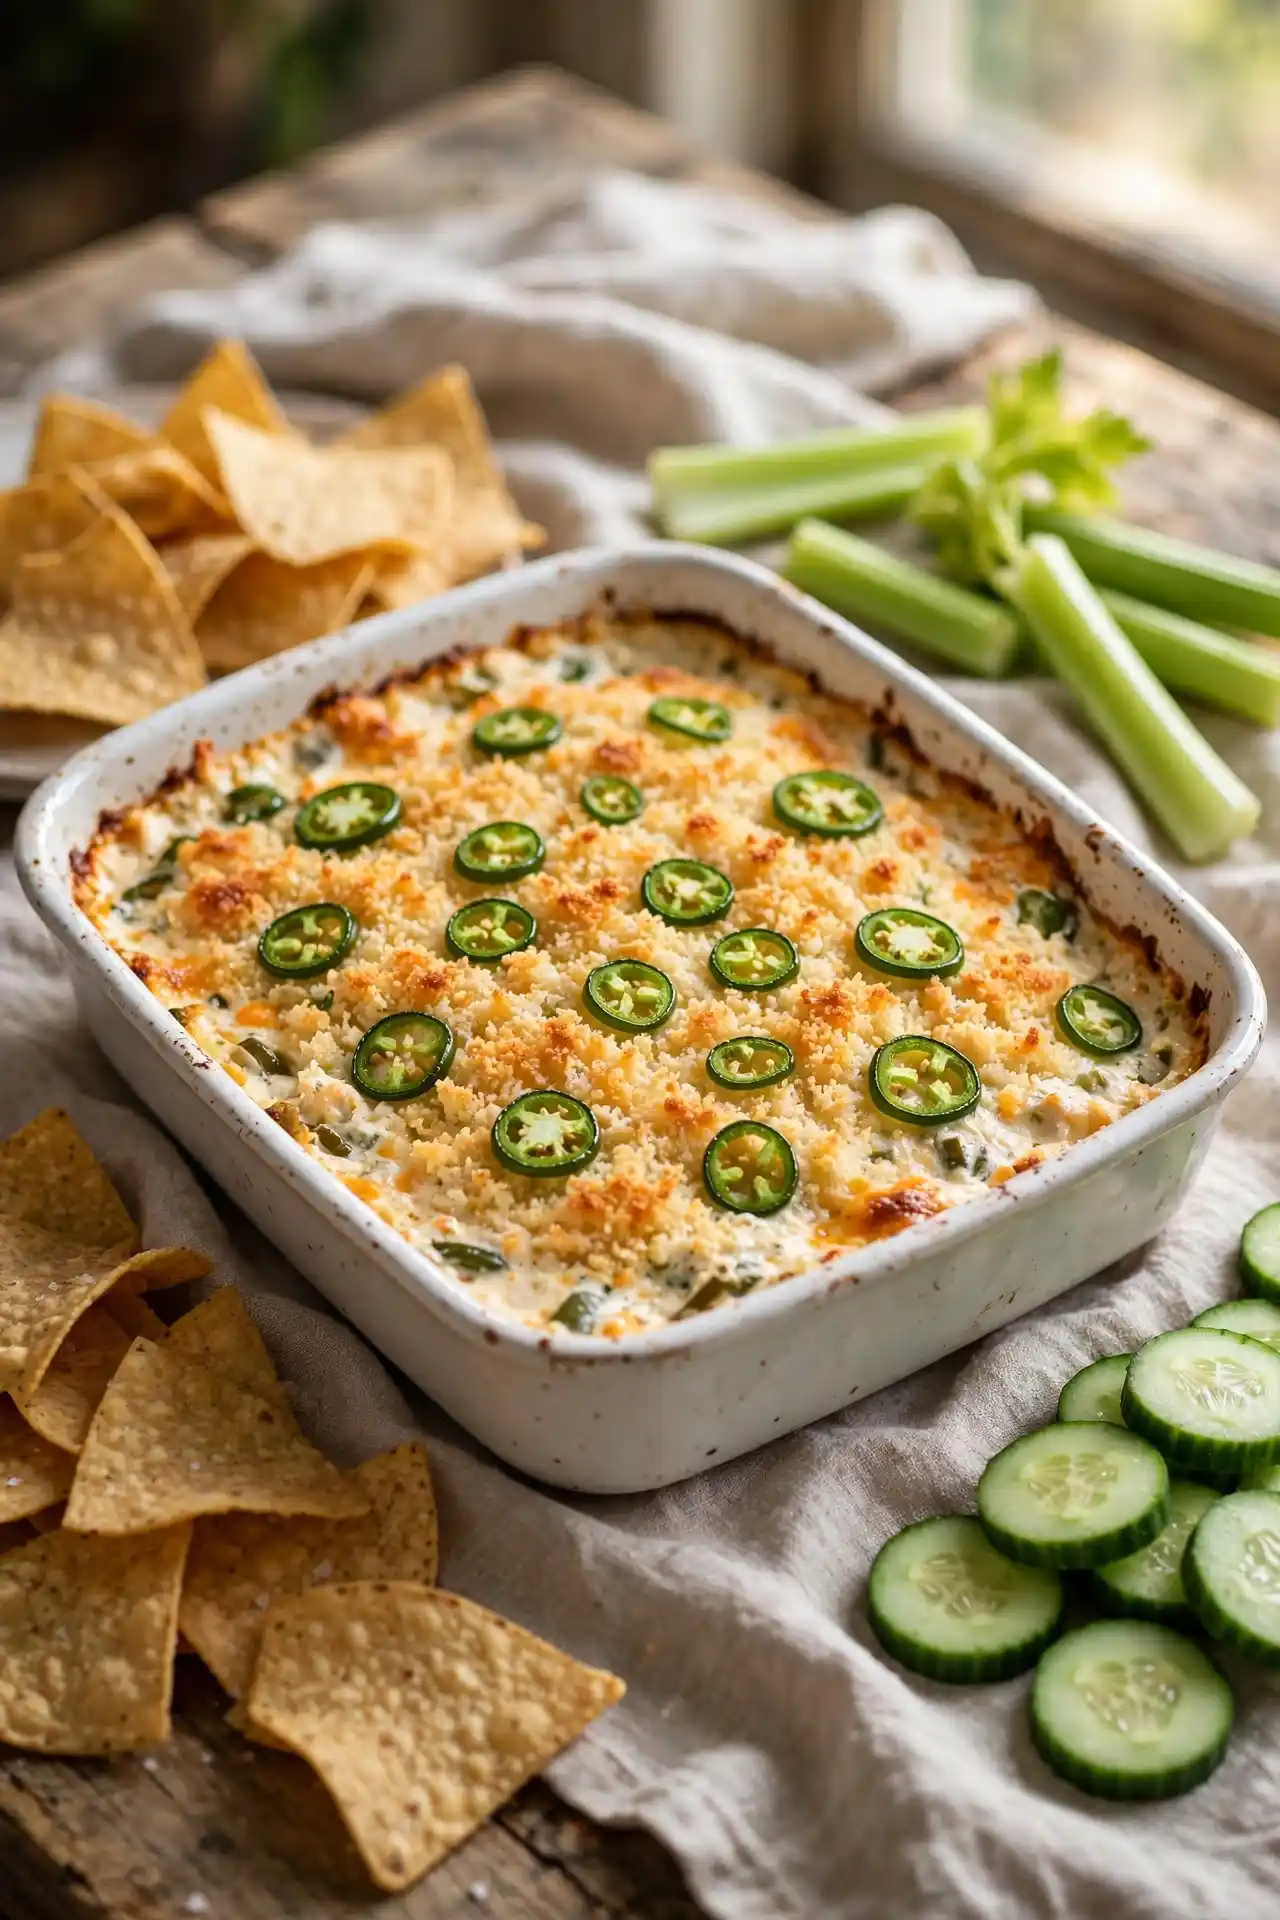
What to Serve With Jalapeño Popper Dip
Jalapeño popper dip is rich and concentrated, so the best dippers tend to be neutral and sturdy enough to hold a generous scoop.
Thick tortilla chips: The classic pairing. Thicker varieties hold up without snapping under the weight of the dip. Thin, crispy chips tend to break before you get them to your mouth.
Pita chips: Lower in salt than most tortilla chips, which lets the flavor of the dip come through more clearly without competition.
Celery sticks: The cool, crisp texture cuts through the richness of the cream cheese base and adds a clean contrast to every bite.
Toasted baguette slices: Absorbs the dip well and shifts this from a party appetizer into something closer to a spread, which changes how people eat it entirely.
Cucumber rounds: Neutral flavor, light crunch, and the cold temperature contrasts well against a dip served fresh from the oven.
Storage, Reheating, and Make-Ahead
Fridge: Transfer leftover dip to an airtight container. It keeps for up to 4 days. The panko topping will soften in storage — this is expected and doesn’t affect the flavor.
Freezer: Freeze this dip before baking, not after. Assemble the full cream cheese base in a freezer-safe baking dish without the panko topping. Wrap tightly first with plastic wrap pressed directly onto the surface of the dip, then cover with foil. Freeze for up to 2 months. To use, thaw overnight in the fridge, add the fresh panko topping, and bake as directed, adding 5 minutes to the cook time since the dish starts cold.
Reheating leftovers: Cover the dish loosely with foil and bake at 350°F (175°C) for 15 to 18 minutes until heated through. Remove the foil for the last 5 minutes to re-crisp the topping. For single portions, microwave at 50% power in 45-second intervals, stirring between each.
Make-ahead: Prepare the full dip base and spread it into the baking dish up to 24 hours in advance. Cover tightly and refrigerate. Add the panko topping just before baking, and add 3 to 5 extra minutes to the cook time since the dish starts cold from the fridge.
Allergen Information
Contains gluten (panko breadcrumbs). To make this gluten-free, substitute an equal amount of certified gluten-free panko or gluten-free breadcrumbs for the topping.
Contains dairy (cream cheese, cheddar, Monterey Jack, Parmesan, butter, sour cream). For a dairy-free version, use cashew-based cream cheese, dairy-free shredded cheese, dairy-free sour cream, and a vegan butter alternative. Note that the texture and melting behavior will differ from the original.
Contains eggs (mayonnaise). To make this egg-free, use an egg-free mayonnaise substitute, which is widely available in most grocery stores.
Always check individual product labels for cross-contamination notices before serving to anyone with a severe food allergy. For current allergen labeling standards, refer to the FDA Food Allergen Labeling and Consumer Protection Act guidelines.
Nutrition Information
Per serving, based on 10 servings
| Nutrient | Per Serving |
|---|---|
| Calories | 385 kcal |
| Protein | 12 g |
| Total Carbohydrates | 8 g |
| Dietary Fiber | 0.5 g |
| Total Sugars | 2 g |
| Total Fat | 35 g |
| Saturated Fat | 18 g |
| Sodium | 510 mg |
| Cholesterol | 95 mg |
| Potassium | 105 mg |
| Calcium | 220 mg |
| Iron | 0.5 mg |
Nutritional values are estimates only and may vary based on specific ingredients, brands, and portion sizes used. For precise dietary needs, consult a registered dietitian.
Frequently Asked Questions
Can I make jalapeño popper dip the day before?
Yes. Assemble the full cream cheese base, spread it into the baking dish, and refrigerate covered for up to 24 hours. Add the panko topping right before baking and add 3 to 5 extra minutes to the cook time since the dish starts cold from the fridge.
How do I make it less spicy?
Remove the seeds and white membrane from all four jalapeños and reduce the total number of fresh peppers to two. The canned green chiles still add mild warmth, so the dip won’t be completely neutral, but it becomes manageable for most people who are sensitive to heat. You can also replace one jalapeño with a finely diced green bell pepper, which keeps a pepper flavor without any heat at all.
Can I use canned jalapeños instead of fresh?
Yes. Use ¼ cup of drained, chopped canned jalapeños as a direct substitute. The flavor comes in slightly more acidic from the pickling brine, and the heat tends to be softer than fresh peppers. A mix of both — two fresh jalapeños plus 2 tablespoons of canned — also works well and gives a more layered flavor.
Can I make this in a slow cooker?
The dip base can go into a slow cooker on low for 2 to 3 hours, stirring once halfway through. However, a slow cooker cannot crisp the panko topping. Once the dip is hot and melted through, transfer it to an oven-safe dish, add the panko topping, and broil for 2 to 3 minutes, watching closely to avoid burning.
Why did my dip turn out watery?
The three most common causes are undrained canned chiles, reduced-fat cream cheese, and overbaking. Press the drained chiles dry before adding them, use full-fat cream cheese throughout, and pull the dip from the oven as soon as the edges bubble and the topping is golden.
How long does it keep in the fridge?
Up to 4 days in an airtight container. Reheat covered with foil in a 350°F oven, or use the microwave at 50% power in short intervals.
Can I freeze this dip?
Yes, but only before baking and without the panko topping. Wrap and freeze for up to 2 months. Thaw overnight in the fridge, add the fresh topping, and bake as directed.
Conclusion
Jalapeño popper dip earns its place as a party staple because it actually delivers on the flavor of the appetizer it’s based on. The two-pepper approach, fresh jalapeños plus canned green chiles, keeps it from tasting flat or one-dimensional. The Parmesan-panko crust gives it something a plain warm dip never has: real crunch. Assemble it the night before, pull it from the fridge 20 minutes before guests arrive, add the topping, and bake it fresh. That single step makes a noticeable difference in how the finished dish holds up on the table.
Jalapeño Popper Dip: Recipe Card
Jalapeño Popper Dip
Ingredients
Method
- Preheat oven to 375°F (190°C). Grease a 9-inch square baking dish with cooking spray or softened butter.
- Beat both blocks of softened cream cheese with a hand mixer or spatula until completely smooth with no visible lumps.
- Add sour cream and mayonnaise. Mix until fully combined into one uniform base.
- Fold in cheddar, Monterey Jack, diced jalapeños, drained green chiles, garlic, onion powder, smoked paprika, salt, and pepper until evenly distributed.
- Spread the mixture evenly into the prepared baking dish.
- In a small bowl, stir together panko, melted butter, Parmesan, garlic powder, and salt until all breadcrumbs are coated.
- Scatter the panko topping evenly over the dip.
- Bake on the center rack for 22 to 25 minutes, until the edges are actively bubbling and the topping is deep golden brown. Center of the dip should reach 74°C (165°F) on an instant-read thermometer.
- Rest 5 minutes before serving.